Band Steering

Band steering is a Wi-Fi feature that automatically pushes devices between 2.4GHz and 5GHz networks. While it can improve general Wi-Fi performance, some devices may struggle with it and fail to connect properly.

This can be especially relevant for solar inverters, as many inverter monitoring devices are designed to work best on a stable 2.4GHz Wi-Fi connection. When band steering is enabled, the modem may try to move the inverter between bands or confuse the connection during setup, which can lead to dropouts, failed pairing, or the inverter showing offline in the monitoring app.

How do you know if band steering is causing the issue?

A common sign is when some devices cannot connect to Wi-Fi properly while your phone, laptop, or other devices work fine. This often happens when both 2.4GHz and 5GHz are combined under the same Wi-Fi name.

Talk to your internet service provider if you are experiencing issues related to band steering.

10kW Solar Battery Price

A 10kWh battery is one of the most popular solar battery sizes for Australian homes. It offers a strong balance between useful storage capacity and overall system cost. It also suits many homes that already have solar and want to use more of their own energy instead of relying as heavily on the grid in the evening.

General Price of a 10kWh Solar Battery in NSW

In NSW, the average installed cost of a 10kWh solar battery sits around $9,000 to $13,000. That works out to roughly $900 to $1,300 per kWh installed. The final price depends on the battery brand and how simple or complex the installation is.

The total installed price usually includes more than the battery itself. It can also include labour, electrical work, safety components, monitoring setup, and any switchboard or backup changes needed for the property. A simple solar battery installation may sit closer to the lower end of the range. A more complex setup may cost more.

That is why there is no single battery price that suits every home. The best quote depends on your electricity usage, your existing solar system, and the battery setup that fits your property properly.

Save before battery rebates drop

Talk to one of SolarBright’s solar battery experts about battery options around 10kWh. Save before battery rebates go down.

Book Your Free Consulation

Why a 10kWh Solar Battery Is So Popular

A 10kWh solar battery is one of the most popular solar battery for home options because it offers a practical balance of storage capacity, everyday usability, and value for many average households.

A 10kWh battery is a practical fit for many average households because it stores excess solar energy during the day and shifts it into the evening. That is usually when solar production has dropped but household demand is still high. This helps homeowners reduce reliance on grid electricity and make better use of the solar power they already generate.

Average household electricity use in NSW is about 15.5kWh per day. A large share of that usage often happens between 4 PM and 9 PM. That is why a 10kWh battery is often seen as a smart size for average homes. It can cover a large portion of nighttime demand for many households.

For many homeowners, that means lower evening grid imports, better solar self-consumption, and more protection against rising electricity costs.

Battery Rebates Can Improve the Value

Battery rebates and incentives can make a real difference to the upfront cost of a system. A 10kWh class battery can attract over $3,300 through the Federal Battery Rebate, plus over $1,000 in additional incentive value. That can bring total savings to more than $4,300 on an eligible installation.

Rebate eligibility depends on certified installation, and regional pricing or more complex jobs can affect the final installed cost.

This is why battery pricing should always be looked at in context. The headline battery cost matters, but the installed price after available savings is often the more useful number.

Is a 10kWh Battery Enough for Most Homes?

For many homes, yes. A 10kWh battery is often enough to cover a large share of evening electricity use, especially when it is paired with a suitable solar system. The most important factor is not just the battery size itself. It is how well that battery matches the home’s actual usage pattern.

A good starting point is to review your electricity bills across the year. Look at your average daily usage. Then look at how much of that usage happens at night. During the day, your solar system powers the home first. Any extra generation charges the battery. The stored electricity is then used later in the evening.

If your household uses more electricity after sunset, a 10kWh battery can be a very practical size. If your usage is higher than average, you may need a larger or expandable system.

Save 7,000+ in Rebates

Unlock over $7,000 in available rebates with our 9.6kWh battery and 6.6kW solar special, designed to help you lower upfront costs and get more value from your solar investment.

Grab this offer

What Size Solar System Is Needed to Fill a 10kWh Battery?

Your solar system must produce enough electricity during the day to run the home and still leave enough spare energy to charge the battery. In NSW, a typical solar system produces around 3.9kWh per day for each 1kW of system size, averaged across the year. That means a 6.6kW solar system can produce about 25.74kWh per day on average.

That is why a 6.6kW solar system paired with a 10kWh battery is such a common combination. On average, that level of solar generation can cover daytime use, charge the battery, and still leave some energy available for export. Actual output still varies with season, weather, roof angle, and shading.

10kWh Solar Battery Options and Modular Combinations

Not every battery comes as an exact 10.0kWh system. Many leading brands use modular battery designs. That means the closest match to 10kWh may sit slightly below or slightly above that number.

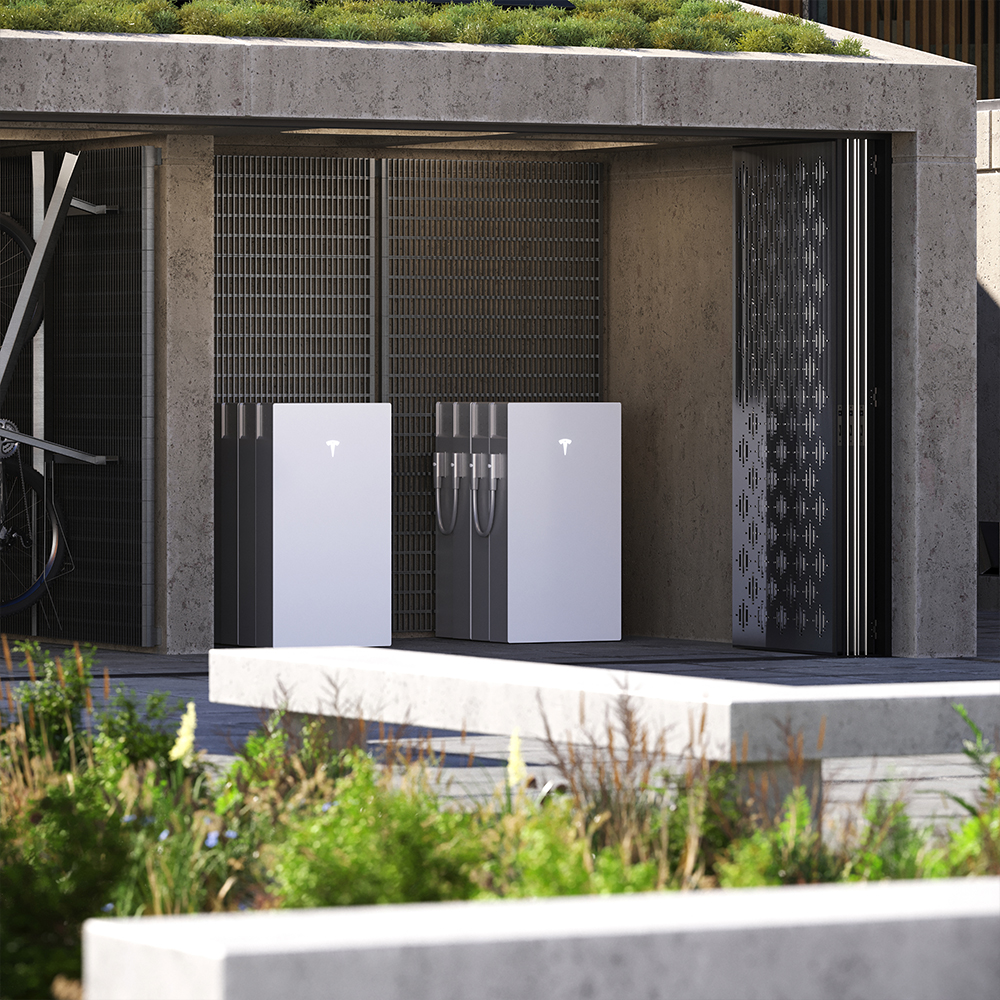
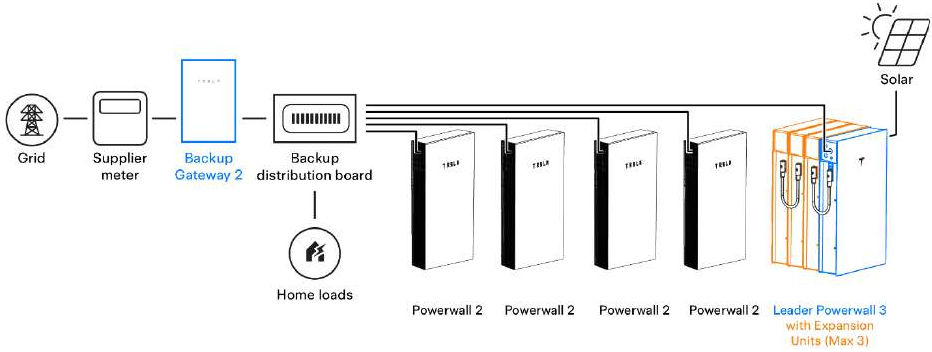
Tesla Powerwall 3 and Expansion Pack

Tesla Powerwall 3 sits above the usual 10kWh category. It is better suited to homeowners who want a larger all-in-one battery from the start. It can also be expanded further with a Powerwall 3 Expansion Pack if more storage is needed later. This makes Tesla a strong option for buyers who are comfortable stepping above the 10kWh range rather than matching it exactly.

Sungrow SBR

Sungrow SBR is one of the closest matches for homeowners shopping around the 10kWh mark. A common setup is 9.6kWh, which sits very close to 10kWh and works well for many average homes. It is a practical option for buyers who want a battery in the 10kWh class without moving too far above that size.

The key features highlighted for this battery include a 10-year warranty, emergency backup power, a smart and safe design, and a user-friendly monitoring app. Those features add real value beyond storage capacity alone.

Sungrow SBH

Sungrow SBH is another modular battery range, but it is better suited to homes wanting more storage capacity from the start. It is more relevant for households with higher electricity demand or bigger battery goals. For homeowners targeting a 10kWh class battery, SBH may be larger than necessary. For bigger homes, it can be worth considering.

SolaX Triple Power

SolaX Triple Power offers another useful option in this category because it uses a 5.1kWh module. A two-module setup comes to 10.2kWh, which is very close to the 10kWh target. That makes it a strong option for homeowners who want modular flexibility while staying close to the 10kWh range.

Why Modular Batteries Matter

Modular battery systems give homeowners more flexibility. You can choose a size that suits your current usage and budget, then expand later if your needs grow. That can be useful for homes planning future changes such as electric vehicles, extra cooling, or higher overall electricity demand.

This is why battery sizing should not focus only on finding an exact round number. A 9.6kWh system can be a strong fit. A 10.4kWh system can also be a strong fit. In some homes, a larger option such as Tesla Powerwall 3 may make more sense. The right answer depends on your usage, your solar generation, and what you want the battery to do.

What Homeowners Should Compare Beyond Price

Price matters, but it should not be the only factor. Homeowners should also compare warranty length, backup capability, expandability, monitoring, safety, brand support, and installation quality. These details shape the long-term value of a battery system just as much as the upfront price does.

A battery that is sized correctly and installed properly will usually deliver better long-term value than a cheaper option that does not match the household well.

Post-Installation Support and Brand Accreditations Matter

Choosing the right battery is important, but what happens after installation matters too. Strong post-installation support helps homeowners with app setup, system monitoring, backup settings, warranty guidance, and any questions that come up after handover.

It also gives you a clearer support path if anything needs attention later, which can make battery ownership much easier and more reassuring over the long term.

SolarBright is a multi-award-winning solar battery installer accredited by leading brands including Tesla, Sungrow and SolaX. Beyond delivering quality solar battery installations, we also provide reliable ongoing support, so if something goes wrong with your system, you have an experienced team to turn to.

Looking for a 10kWh Battery?

If you are looking for a solar battery system and want expert advice on the right option for your home, Contact SolarBright or book a free consultation with our team.

Tesla Powerwall 2 and 3 Compatibility

Good news for existing Tesla Powerwall 2 owners.

Tesla is now allowing Tesla Powerwall 3 to be added to existing Powerwall 2 systems, giving homeowners a new pathway to expand battery storage without needing to replace their current setup.

This is a significant update because, until now, Powerwall 2 and Powerwall 3 were generally treated as separate system types. With this change, some existing Powerwall 2 installations will be able to expand using newer Powerwall 3 hardware, provided the system meets Tesla’s compatibility requirements.

Pre-Book Your Powerwall Upgrade

Already have Powerwall 2 and thinking about adding Powerwall 3? Get ahead of the June 2026 compatibility rollout and speak with SolarBright about your upgrade options, supported configurations, and site suitability.

Pre-Book Your Powerwall 3 Upgrade

Supported Tesla Powerwall 2 + Powerwall 3 Configuration

Tesla has outlined a supported maximum configuration for combining Powerwall 2 and Powerwall 3 products as follows:

  • Up to 4 x Powerwall 2 units
  • 1 x Powerwall 3 acting as the leader
  • Up to 3 x Powerwall 3 Expansion Packs

In simple terms, this means an existing Powerwall 2 owner may be able to add one standard Powerwall 3 unit to lead the system, and then increase total storage further with up to three Powerwall 3 Expansion Packs, depending on site suitability and Tesla’s final approval requirements.

This update could be especially valuable for homeowners who already have Powerwall 2 installed but now want more battery capacity, improved backup capability, or a pathway into Tesla’s newer battery platform without starting from scratch.

FAQs About Tesla Powerwall 2 and Powerwall 3 Compatibility

Can Powerwall 3 be added to an existing Powerwall 2 system?

Yes. Tesla now allows Powerwall 3 to be added to selected existing Powerwall 2 systems, provided the installation has supported hardware and firmware in place.

When will Powerwall 2 and Powerwall 3 compatibility be available?

Tesla’s firmware update that supports this compatibility is expected to be released in June 2026. Installation will depend on that firmware being available and the site meeting Tesla’s requirements.

Can all Powerwall 2 systems be upgraded with Powerwall 3?

Not necessarily. Compatibility depends on whether the existing system has the required supported hardware and can receive the necessary firmware update. Some older or non-supported setups may not qualify.

How many Powerwall 3 units can be added to an existing Powerwall 2 system?

Based on the supported configuration provided, a combined system can include up to four Powerwall 2 units, one Powerwall 3 acting as the leader, and up to three Powerwall 3 Expansion Packs.

Does Powerwall 3 replace Powerwall 2 in this type of setup?

No. In this configuration, Powerwall 3 is added to the existing Powerwall 2 system rather than replacing it. This allows homeowners to expand storage while continuing to use their current Powerwall 2 units.

What does it mean for Powerwall 3 to be the leader?

In this supported setup, Powerwall 3 acts as the leader unit for the system. This means it manages the newer expansion arrangement and allows the system to integrate compatible Powerwall 3 Expansion Packs alongside existing Powerwall 2 batteries.

Can Powerwall 3 Expansion Packs be installed without a Powerwall 3 unit?

No. Powerwall 3 Expansion Packs require a Powerwall 3 leader unit. They cannot be added on their own to a Powerwall 2-only system.

Will every home with Powerwall 2 be suitable for this upgrade?

Not always. Suitability will depend on factors such as existing hardware, firmware compatibility, site conditions, and Tesla’s installation requirements.

Looking to Add Powerwall 3 to Your Existing Powerwall 2 System in Sydney or NSW?

SolarBright is a Powerwall Premium Certified Installer helping homeowners across Sydney and NSW. If you already have Powerwall 2 and want to expand your battery capacity with Tesla Powerwall 3 and Tesla Powerwall 3 Expansion Pack, SolarBright can help assess your system compatibility, upgrade pathway, and the right configuration for your home.

Contact Contact SolarBright or book a free consultation to discuss adding Powerwall 3 to your existing Powerwall 2 setup.

DIY Solar Roof Ventilation Systems

DIY solar roof ventilation refers to solar-powered roof ventilation designed for homeowners who are confident working safely at heights and following installation instructions carefully.

The concept is simple. A roof-mounted solar panel powers a fan that extracts hot air trapped inside your roof cavity, helping reduce heat build-up before it transfers down into your living areas.

For many homeowners, it’s an appealing upgrade. It’s a one-time installation that can improve summer comfort, support better roof-space airflow, and reduce the intense heat that builds up under your roof on hot days.

How Solar Roof Ventilation Works (Simple Explanation)

Your roof cavity can store significant heat. When the sun hits your roof, hot air accumulates inside the roof space and can remain there for hours.

A solar roof ventilator helps by:

  • Extracting hot air from the roof cavity
  • Allowing fresh air to enter through eaves or passive vents
  • Reducing the overall heat load sitting above your ceiling

Because the system is solar powered, it runs hardest when the sun is strongest which is exactly when your roof space is hottest.

Is DIY Solar Roof Ventilation Easy to Install?

It can be. But “easy” depends on preparation, roof access, and attention to detail.

A successful DIY installation usually requires:

  • Confidence using basic tools (measuring, drilling, cutting neatly)
  • Careful step-by-step installation
  • Safe roof access and comfort working at heights
  • Proper flashing installation to keep the roof watertight

Most DIY solar ventilators are simpler than wired alternatives because standard daytime operation typically involves:

  • No mains electrical wiring
  • A clear installation sequence
  • Straightforward mounting and sealing

Where DIY installs succeed or fail is almost always the same area – waterproofing. If flashing is installed correctly and the unit is seated properly, the rest of the installation is generally straightforward.

50% Off Installation on DIY-Friendly MaxBreeze

SolarBright is offering 50% off MaxBreeze Solar Roof Ventilator installation fee until 31 May 2026 – grab it before it expires.

Secure the offer

What a Typical DIY Installation Involves

While each product has its own instructions, most follow this process:

  1. Choose the location – Select a roof section with strong sun exposure and effective extraction positioning.
  2. Measure and mark accurately – Precision matters for a clean fit.
  3. Cut the opening carefully – Take your time. Clean cuts reduce sealing issues later.
  4. Install flashing first – This is critical for long-term weather protection.
  5. Mount and secure the unit – Fix into place according to manufacturer guidelines.
  6. Position the solar panel -Angle correctly for optimal sunlight capture.
  7. Test operation – Confirm performance and double-check all seals and fixings.

What to Look for in a DIY-Friendly Solar Roof Ventilator

If you’re planning to install it yourself, choose a system that reduces guesswork and risk.

When looking for a DIY-friendly solar roof ventilator, look for::

  • A modular, integrated kit design
  • Roof-specific flashing options
  • Clear installation guides with roof-type instructions
  • Automatic operation without manual controls
  • Upgrade options that do not change the base installation process

The right product makes the difference between a smooth project and a frustrating one.

Introducing MaxBreeze – DIY Solar Roof Ventilation by SolarBright

If you want a solar roof ventilation system built specifically with DIY in mind, MaxBreeze by SolarBright has been designed to keep installation practical, predictable, and clean.

Integrated System Design

MaxBreeze is engineered as a complete system. The fan unit, flashing options, and solar panel components are designed to work together. This helps reduce improvisation and produces a neater final result.

Clear Installation Guidance

Before installation, reviewing the official installation guides is strongly recommended. Roof-type flashing steps, panel positioning, and orientation details are clearly outlined.

No Complex Wiring for Standard Operation

For standard daytime ventilation, MaxBreeze runs entirely on solar power. There is no complex electrical work required, keeping the focus on correct placement and sealing.

Flashing-First Design

MaxBreeze prioritises proper flashing installation from the beginning. When installed correctly, this significantly reduces the risk of leaks and helps maintain roof integrity.

Straightforward Upgrade Path

Higher models and optional add-ons are designed as extensions to the base system rather than completely different installation methods. The core DIY process remains consistent.

Is DIY Right for You?

DIY solar roof ventilation can be a smart project for capable homeowners who prioritise correct sealing and safe roof access.

If you are unsure about roof pitch, flashing requirements, or safety considerations, professional installation may be the better option.

For advice on selecting the right MaxBreeze system for your roof type and ventilation goals, contact SolarBright for a free consultation. Our team can guide you through the options and help you decide whether DIY installation suits your situation.